Portal API
The Portal API provides programmatic access to authentication tokens and allows you to inspect the current identity context, such as user claims and session expiration.
Request Requirements
To interact with the Portal API endpoints, your request must satisfy at least one of the following conditions to ensure a JSON response:
- The following HTTP header is present
Accept: application/json. - The URL Parameter
format=jsonin the query string
In the examples below, the portal is at
https://auth.myfiosgateway.com:8443/auth/.export AUTH_PORTAL_BASE_URL=https://auth.myfiosgateway.com:8443/auth
User Login API
The login endpoint /login allows users to log in.
The authentication process is challenge-based.
Initial Login Request
To begin the sequence, send a POST request with a JSON
payload containing the user's credentials and realm.
{
  "username": "<username or email>",
  "realm":    "<realm_name>"
}
Here, we are initiating login sequence for jsmith user.
curl -s -X POST ${AUTH_PORTAL_BASE_URL}/login \
-H 'Accept: application/json' -H "Content-Type: application/json" \
-d '{"username": "jsmith", "realm": "local"}'
The response:
{
  "sandbox_id": "pCbGuPPvVWN4pGTZ7catkm9T14qEYgtvVU91Jn",
  "sandbox_secret": "oulYNaZcG4wuNbedKn5HXPB6Rf7RlZjas1Lra6MaKP12eM",
  "next_challenge": "password"
}
The data in the response helps navigate challenge-response sequence.
Upon receiving the initial request, the portal determines the necessary challenges (e.g passwords, MFA, or recovery codes) required for the user to proceed.
Password Challenge
In the previous response from Portal API we got sandbox_id, sandbox_secret, and next_challenge.
The value of the next_challenge is password.
The next step is to provide the password.
curl -s -X POST ${AUTH_PORTAL_BASE_URL}/login \
-H 'Accept: application/json' -H "Content-Type: application/json" \
-d '{"username": "jsmith", "realm": "local", "sandbox_id": "pCbGuPPvVWN4pGTZ7catkm9T14qEYgtvVU91Jn", "sandbox_secret": "oulYNaZcG4wuNbedKn5HXPB6Rf7RlZjas1Lra6MaKP12eM", "challenge_kind": "password", "challenge_response": "My@Password123"}'
MFA Application Passcode Challenge
Let's configure MFA app for jsmith. That will increase the amount of authentication challenges for the user.
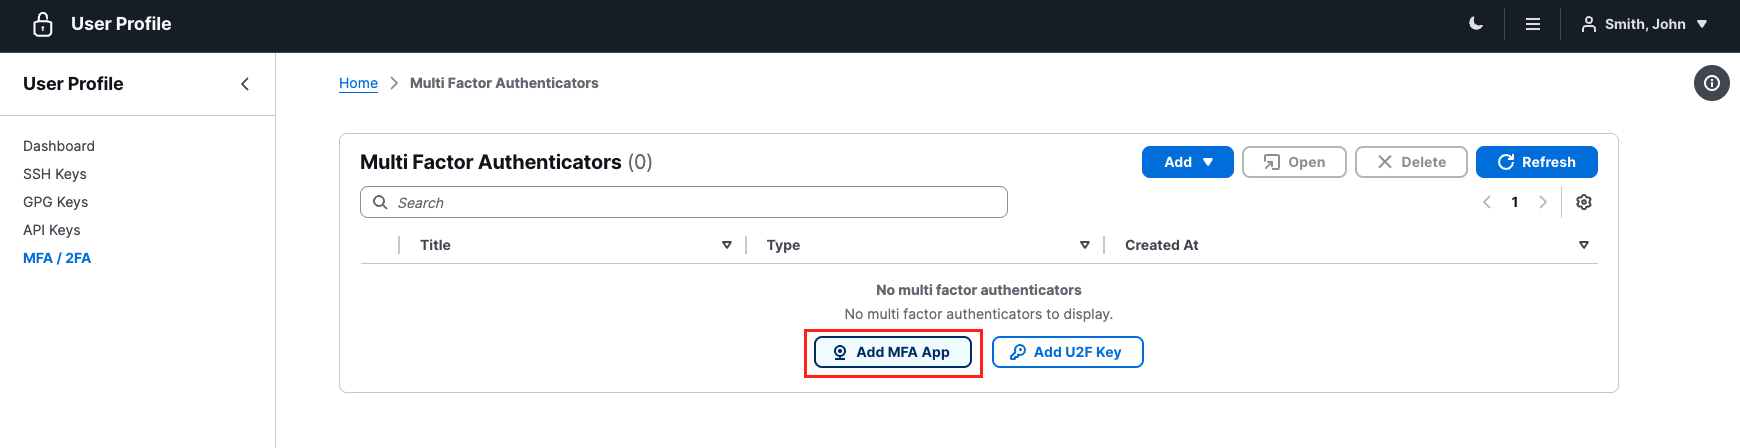
For demostration purposes, copy the "Token Secret". It could be used for automating of MFA passocode generation.
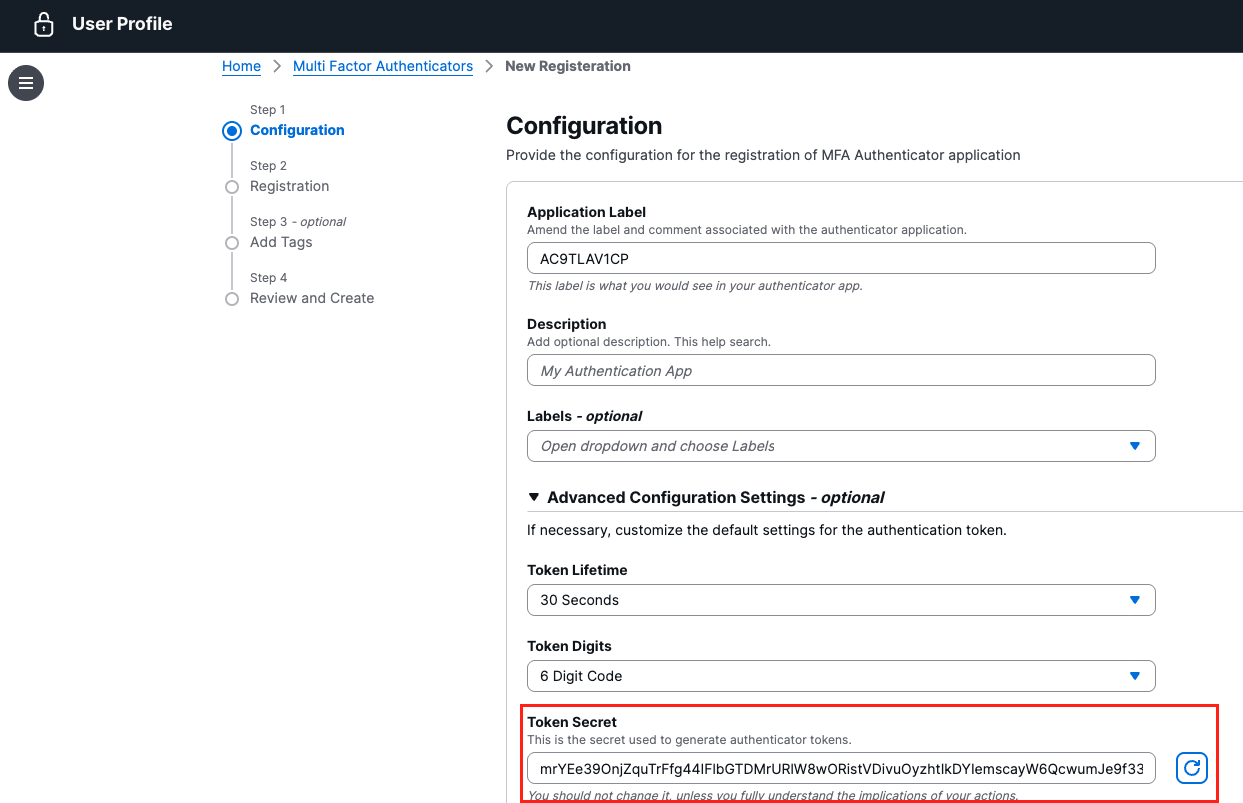
In this case the secret is mrYEe39OnjZquTrFfg44IFlbGTDMrURlW8wORistVDivuOyzhtIkDYIemscayW6QcwumJe9f33C6a6ruUaZn5qxTKkJq.
After completing the registration, we have our app token as second factor for authentication purposes.

Let's replay the authentication sequence:
curl -s -X POST ${AUTH_PORTAL_BASE_URL}/login \
-H 'Accept: application/json' -H "Content-Type: application/json" \
-d '{"username": "jsmith", "realm": "local"}' | jq
Response:
{
  "sandbox_id": "QmyqKX1DPxXqx4nvpKDkeAeSd0s5RWE3rCAbhpbIucZ",
  "sandbox_secret": "ockTNMowxaPXt77DxUbJrhf9zPXrI2m7qnuMozuD2WKOJ",
  "next_challenge": "password"
}
The next step is to provide the password.
curl -s -X POST ${AUTH_PORTAL_BASE_URL}/login \
-H 'Accept: application/json' -H "Content-Type: application/json" \
-d '{"username": "jsmith", "realm": "local", "sandbox_id": "QmyqKX1DPxXqx4nvpKDkeAeSd0s5RWE3rCAbhpbIucZ", "sandbox_secret": "ockTNMowxaPXt77DxUbJrhf9zPXrI2m7qnuMozuD2WKOJ", "challenge_kind": "password", "challenge_response": "My@Password123"}' | jq
Response:
{
  "sandbox_id": "QmyqKX1DPxXqx4nvpKDkeAeSd0s5RWE3rCAbhpbIucZ",
  "sandbox_secret": "HdxZqeLXmwVlJvJyIKXaeZykw1hHskFqqHguxVrU9B6",
  "next_challenge": "totp"
}
Note the modifications to the sandbox_secret in the response.
The next step is to provide application token password, e.g. 973554.
curl -s -X POST ${AUTH_PORTAL_BASE_URL}/login \
-H 'Accept: application/json' -H "Content-Type: application/json" \
-d '{"username": "jsmith", "realm": "local", "sandbox_id": "QmyqKX1DPxXqx4nvpKDkeAeSd0s5RWE3rCAbhpbIucZ", "sandbox_secret": "HdxZqeLXmwVlJvJyIKXaeZykw1hHskFqqHguxVrU9B6", "challenge_kind": "totp", "challenge_response": "973554"}' | jq
Te authentication flow is complete. The user is now authenticated.
{
  "authenticated": true,
  "access_token": "eyJhbGciOiJIUzUxMiIsInR5cCI6IkpXVCJ9.eyJhZGRyIjoiMTkyLjE2OC45OS4xODIiLCJlbWFpbCI6ImpzbWl0aEBsb2NhbGhvc3QubG9jYWxkb21haW4iLCJleHAiOjE3NzM3MTI0MjksImlhdCI6MTc3MzcwODgyOSwiaXNzIjoiaHR0cHM6Ly9hdXRoLm15Zmlvc2dhdGV3YXkuY29tOjg0NDMvYXV0aC9sb2dpbiIsImp0aSI6InpjZm50VkRsWlYycmdueEJYdjJ5T0NnOHNWSldxVUVtMmdEOVVNWDJnVTAiLCJuYW1lIjoiU21pdGgsIEpvaG4iLCJuYmYiOjE3NzM3MDg3NjksIm9yaWdpbiI6ImxvY2FsIiwicmVhbG0iOiJsb2NhbCIsInJvbGVzIjpbImF1dGhwL3VzZXIiLCJkYXNoIl0sInN1YiI6ImpzbWl0aCJ9.APovz60JMRhMSwCzWoViRi0ntny0QQu2FAPsT0u_PDGN8m2yFZPc74nR9YNedgmXgAkBVnqygn5ZQ2BKwL4tPQ",
  "access_token_name": "access_token"
}
WebAuthn/U2F Challenge
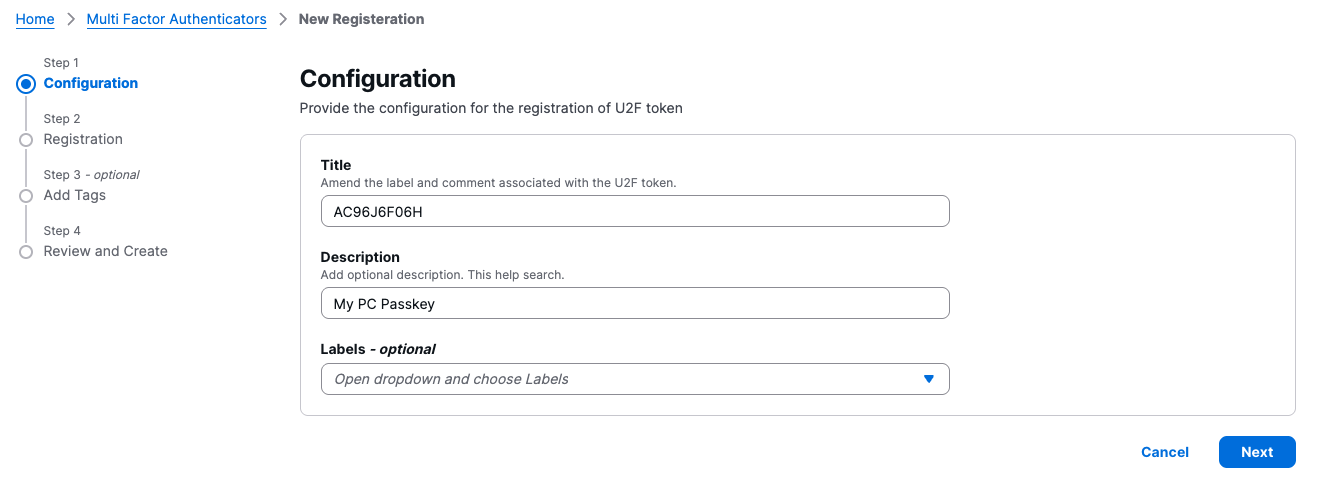
Let's configure WebAuthn (U2F) for jsmith. That will increase the amount of authentication challenges for the user.
Enter a Title and Description for your new token to help you identify it later (e.g., "My PC Passkey"). You can also optionally assign labels from the dropdown menu. Click Next to proceed.
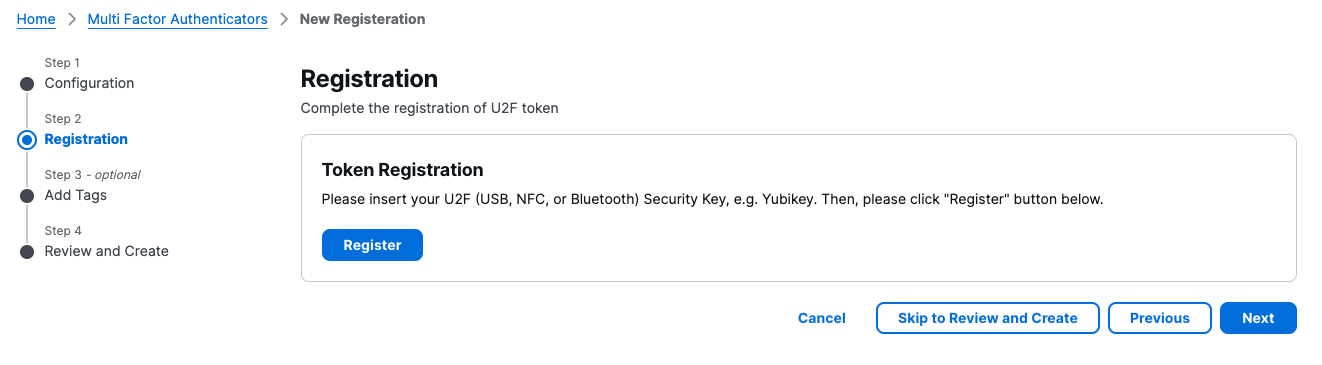
Prepare your hardware security key (like a Yubikey) or your device's built-in authenticator. Click the Register button to begin the handshake.
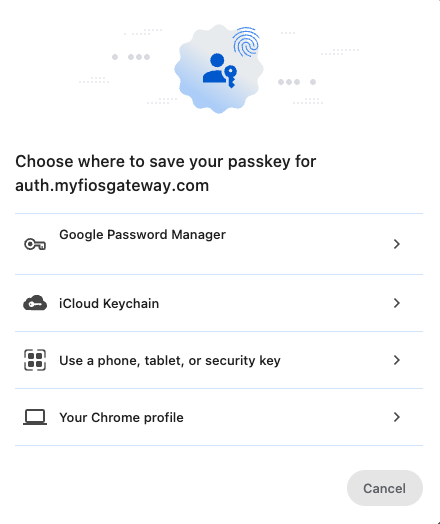
A system prompt will appear asking where you want to save the passkey. Choose from options like Google Password Manager, iCloud Keychain, a Security Key, or your Chrome profile.
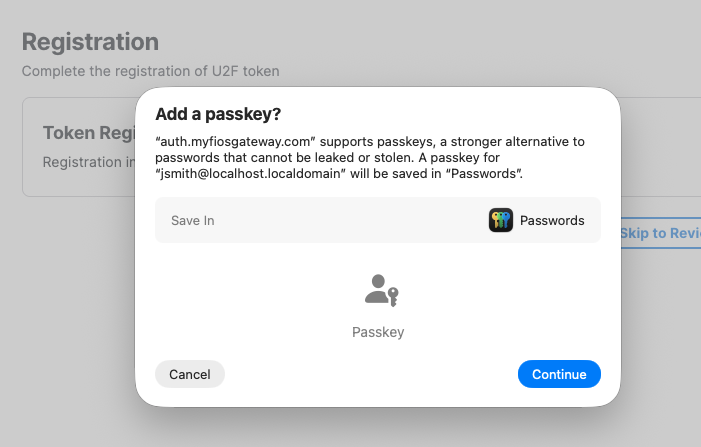
The system will confirm that the site supports passkeys. Click Continue to save the credential to your selected password manager or device.
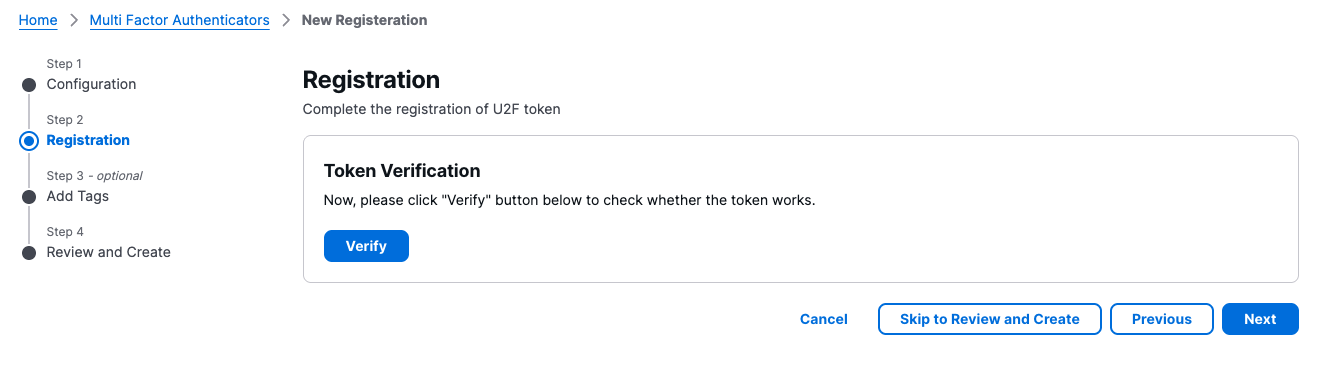
Once the registration is saved, you must test it. Click the Verify button to initiate a test authentication challenge.
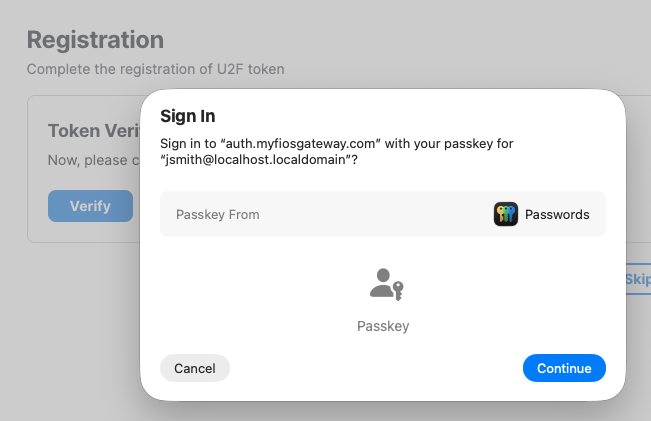
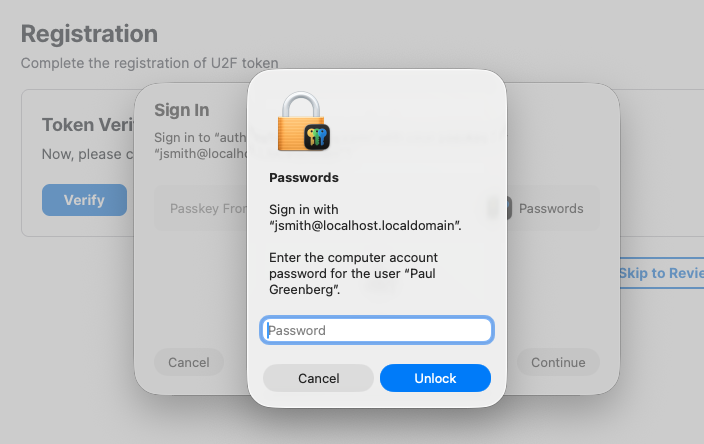
A prompt will appear to sign in using the passkey you just created. Click Continue to move to the final security check.
Provide your local computer account password or biometric (Touch ID/Windows Hello) to authorize the use of the passkey. Click Unlock.
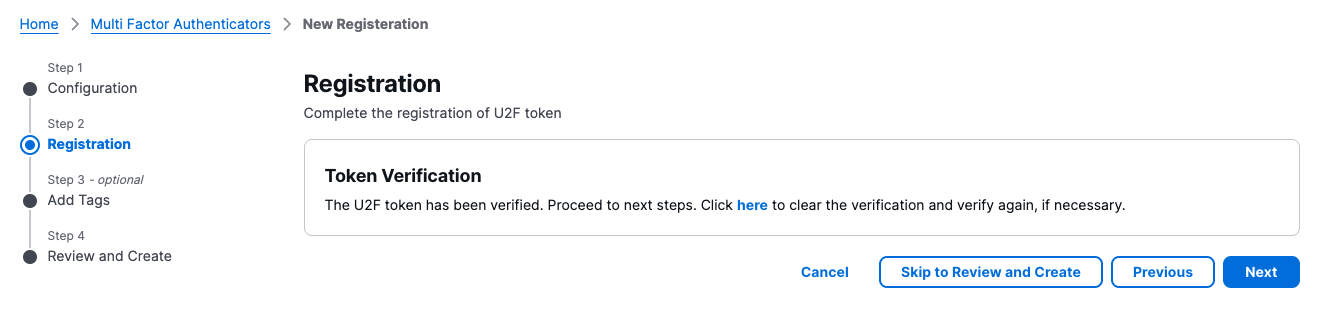
A "Token Verification" success message will appear. Click Next to move to the final review stage.
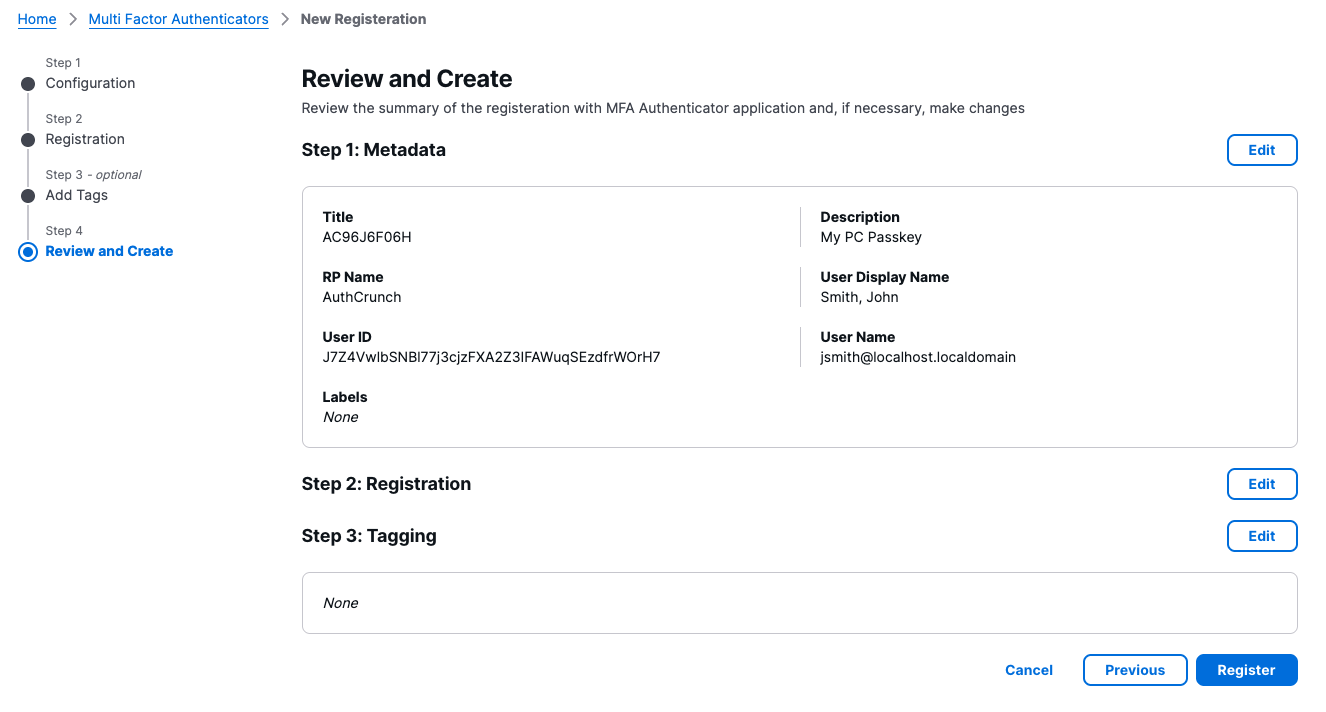
Review the metadata for your new authenticator, including the Title, RP Name, and User Name. If everything looks correct, click Register to finalize the setup.
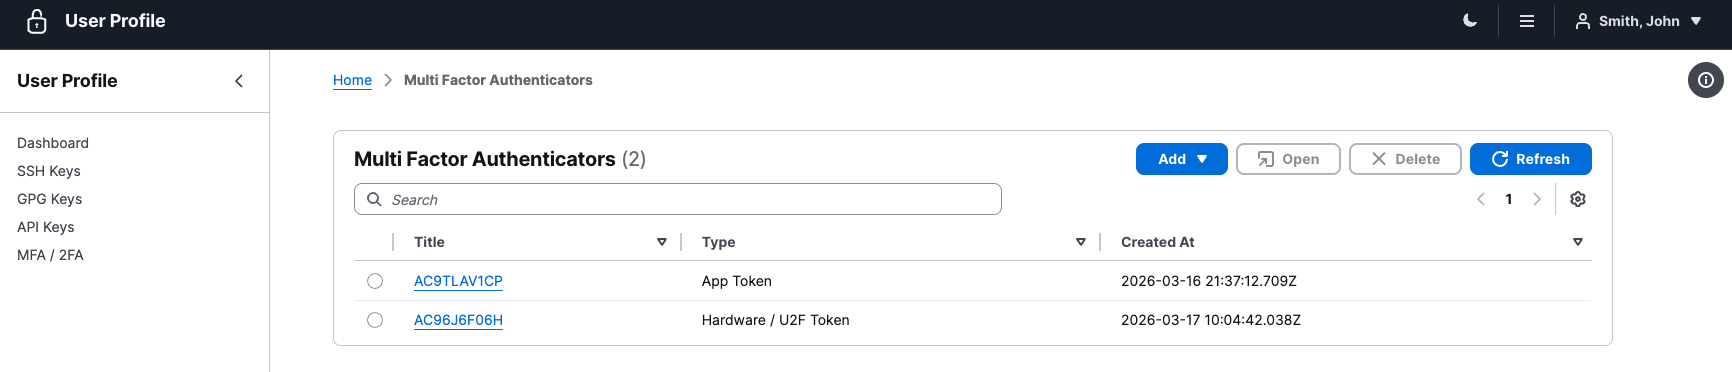
You will be redirected to the Multi-Factor Authenticators dashboard. Your new Hardware / U2F Token will now appear in the list with its creation timestamp.
Let's replay the authentication sequence:
curl -s -X POST ${AUTH_PORTAL_BASE_URL}/login \
-H 'Accept: application/json' -H "Content-Type: application/json" \
-d '{"username": "jsmith", "realm": "local"}' | jq
Response:
{
  "sandbox_id": "fbXpo2HxezJRVBhxLJdG2vLVb43qXSjLPmxooplZq",
  "sandbox_secret": "6Fm1gAttdlcdJhLgmIq862IH2ZYs2aPQHzCb",
  "next_challenge": "password"
}
The next step is to provide the password.
curl -s -X POST ${AUTH_PORTAL_BASE_URL}/login \
-H 'Accept: application/json' -H "Content-Type: application/json" \
-d '{"username": "jsmith", "realm": "local", "sandbox_id": "fbXpo2HxezJRVBhxLJdG2vLVb43qXSjLPmxooplZq", "sandbox_secret": "6Fm1gAttdlcdJhLgmIq862IH2ZYs2aPQHzCb", "challenge_kind": "password", "challenge_response": "My@Password123"}' | jq
Response:
{
  "sandbox_id": "fbXpo2HxezJRVBhxLJdG2vLVb43qXSjLPmxooplZq",
  "sandbox_secret": "2TXTTabXuLN3yTWVxZLuczBZOJH3zVueAVeUeNl",
  "next_challenge": "mfa"
}
Not that the next challenge is mfa, which means that client may choose to either proceed with totp or u2f.
If the client chooses
totp, then thechallenge_responseshould contain the authenticator application passcode.curl -s -X POST ${AUTH_PORTAL_BASE_URL}/login \
-H 'Accept: application/json' -H "Content-Type: application/json" \
-d '{"username": "jsmith", "realm": "local", "sandbox_id": "fbXpo2HxezJRVBhxLJdG2vLVb43qXSjLPmxooplZq", "sandbox_secret": "2TXTTabXuLN3yTWVxZLuczBZOJH3zVueAVeUeNl", "challenge_kind": "mfa", "challenge_response": "634144"}' | jq
If the client chooses u2f, then the challenge_response should contain webauthn.
curl -s -X POST ${AUTH_PORTAL_BASE_URL}/login \
-H 'Accept: application/json' -H "Content-Type: application/json" \
-d '{"username": "jsmith", "realm": "local", "sandbox_id": "fbXpo2HxezJRVBhxLJdG2vLVb43qXSjLPmxooplZq", "sandbox_secret": "2TXTTabXuLN3yTWVxZLuczBZOJH3zVueAVeUeNl", "challenge_kind": "mfa", "challenge_response": "webauthn"}' | jq
The response should start with mfa:u2f: followed by Base64 encoded string containing WebAuthn challenge.
{
    "sandbox_id":"LQneNC1GgeNCeaToTR4lre00NWMiEB8D3D7iAMf5",
    "sandbox_secret":"ucbM9hFCWB1czonSfErawbfbG0HtZQuag3f7FubCnS",
    "next_challenge":"mfa:u2f:omitted"
}
Decode the challenge:
echo -n "omitted" | base64 -d | jq
The decoded string should be something like:
{
    "challenge": "qQrHiiwTA7eRi88e4NW60pjef2hY4hwoOw29jpKIiDY7XL0wb1giY0eZys3sdWqz",
    "rp_name": "AUTHP",
    "timeout": 60000,
    "user_verification": "discouraged",
    "ext_uvm": false,
    "ext_loc": false,
    "tx_auth_simple": "Could you please verify yourself?",
    "credentials": [
        {
            "id": "-81FaozmPszHXQC5-6dPZpbCXyE",
            "transports": "usb,nfc,ble,internal",
            "type": "public-key"
        }
    ]
}
The client responds to WebAuthn challenge by providing it via the challenge_response field.
curl -s -X POST ${AUTH_PORTAL_BASE_URL}/login \
-H 'Accept: application/json' -H "Content-Type: application/json" \
-d '{"username": "jsmith", "realm": "local", "sandbox_id": "LQneNC1GgeNCeaToTR4lre00NWMiEB8D3D7iAMf5", "sandbox_secret": "ucbM9hFCWB1czonSfErawbfbG0HtZQuag3f7FubCnS", "challenge_kind": "mfa", "challenge_response": "<omitted>"}' | jq
Successful Authentication
Once all challenges are successfully resolved, the API returns access_token and refresh_token tokens.
{
  "authenticated": true,
  "access_token": "eyJhbGciOiJIUzUxMiIsInR5cCI6IkpXVCJ9.<omitted>.<omitted>",
  "access_token_name": "access_token",
  "refresh_token": "eyJhbGciOiJIUzUxMiIsInR5cCI6IkpXVCJ9.<omitted>.<omitted>",
  "refresh_token_name": "refresh_token",
  "created_at": "2026-03-16T21:28:39.256249Z"
}
Beacon API
The /beacon endpoint provides a lightweight way to verify a user's authentication status.
A successful check returns a 200 OK status. If the user is unauthenticated, the endpoint
returns a 401 Unauthorized response with a Access denied message.
Source: https://github.com/greenpau/go-authcrunch/blob/main/pkg/authn/handle_json_beacon.go
TMP_TOKEN_FILE="$HOME/.config/authdbctl/token.jwt"
TMP_ACCESS_TOKEN=$(cat "$TMP_TOKEN_FILE" | jq -r .access_token)
curl -v -s -X POST ${AUTH_PORTAL_BASE_URL}/beacon -H "Accept: application/json" -H "Content-Type: application/json" -H "Authorization: access_token=${TMP_ACCESS_TOKEN}"
If the token is expired, you will see the following message in caddy logs:
2026/03/17 12:58:56.302 WARN security Access denied {"session_id": "zj0byfIbUUPoZhGrUOqVy1I4voj70oXJ9tlE", "request_id": "01c4b135-fdd6-47b8-a47a-71cec13f9534", "error": "keystore: parsed token has expired"}
The response follows:
{
  "error": true,
  "message": "Access denied",
  "timestamp": "2026-03-17T13:00:00.896351Z"
}
However, if the token is valid, the response is:
OK
That comes handy when you want quickly check whether to re-authenticate a user.
User Identity API
The /whoami endpoint allows authenticated users to retrieve information about their current session, identity claims, and associated tokens. It supports different levels of verbosity via query parameters.
Standard Response
If no parameters are provided, the endpoint returns the standard user claim map, i.e. a JSON object containing the user's claims (e.g., sub, name, roles, etc.).
TMP_TOKEN_FILE="$HOME/.config/authdbctl/token.jwt"
TMP_ACCESS_TOKEN=$(cat "$TMP_TOKEN_FILE" | jq -r .access_token)
curl -v -s -X POST ${AUTH_PORTAL_BASE_URL}/whoami -H "Accept: application/json" -H "Content-Type: application/json" -H "Authorization: access_token=${TMP_ACCESS_TOKEN}" | jq
The response follows:
{
  "addr": "192.168.99.182",
  "email": "jsmith@localhost.localdomain",
  "exp": 1773758658,
  "iat": 1773755058,
  "iss": "https://auth.myfiosgateway.com:8443/auth/login",
  "jti": "STfliy02dpfKY8w0jRQ7ltDB9WJBQKedkDBZUbwYv",
  "name": "Smith, John",
  "nbf": 1773754998,
  "origin": "local",
  "realm": "local",
  "roles": [
    "authp/user",
    "dash"
  ],
  "sub": "jsmith"
}
Probe Response
By passing ?probe=true, the response will contains two additional fields: expires_in and authenticated.
TMP_TOKEN_FILE="$HOME/.config/authdbctl/token.jwt"
TMP_ACCESS_TOKEN=$(cat "$TMP_TOKEN_FILE" | jq -r .access_token)
curl -v -s -X POST ${AUTH_PORTAL_BASE_URL}/whoami?probe=true -H "Accept: application/json" -H "Content-Type: application/json" -H "Authorization: access_token=${TMP_ACCESS_TOKEN}" | jq
The response follows. The expires_in tells you the number of seconds prior to the token expiration.
This is helpful if you want to refresh the token prior to it expiring. No need to perform expiration time
calculations on the client side.
{
  "addr": "192.168.99.182",
  "authenticated": true,
  "email": "jsmith@localhost.localdomain",
  "exp": 1773758658,
  "expires_in": 2852,
  "iat": 1773755058,
  "iss": "https://auth.myfiosgateway.com:8443/auth/login",
  "jti": "STfliy02dpfKY8w0jRQ7ltDB9WJBQKedkDBZUbwYv",
  "name": "Smith, John",
  "nbf": 1773754998,
  "origin": "local",
  "realm": "local",
  "roles": [
    "authp/user",
    "dash"
  ],
  "sub": "jsmith"
}
Identity Token Response
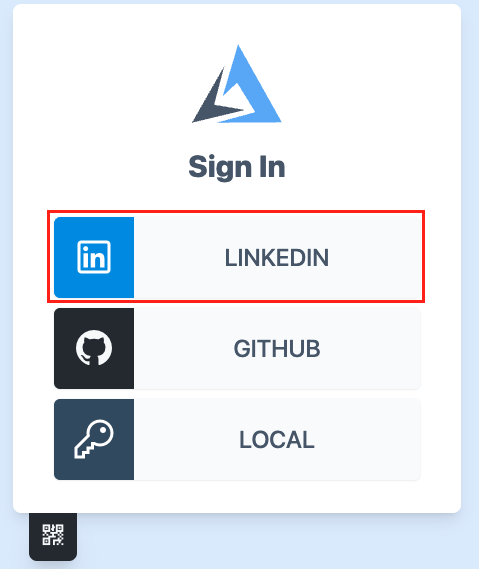
Suppose you have successfully authenticated using the LinkedIn OAuth provider.
That would apply to any OAuth provider issuing
id_token.
The provider's configuration has enable id token cookie:
oauth identity provider linkedin {
    realm linkedin
    driver linkedin
    client_id {env.LINKEDIN_APP_CLIENT_ID}
    client_secret {env.LINKEDIN_APP_CLIENT_SECRET}
    icon linkedin priority 200
    enable id token cookie id_token AUTHP_ID_TOKEN
}
The id_token from the original exchange will be injected in AUTHP_ID_TOKEN cookie by the portal.
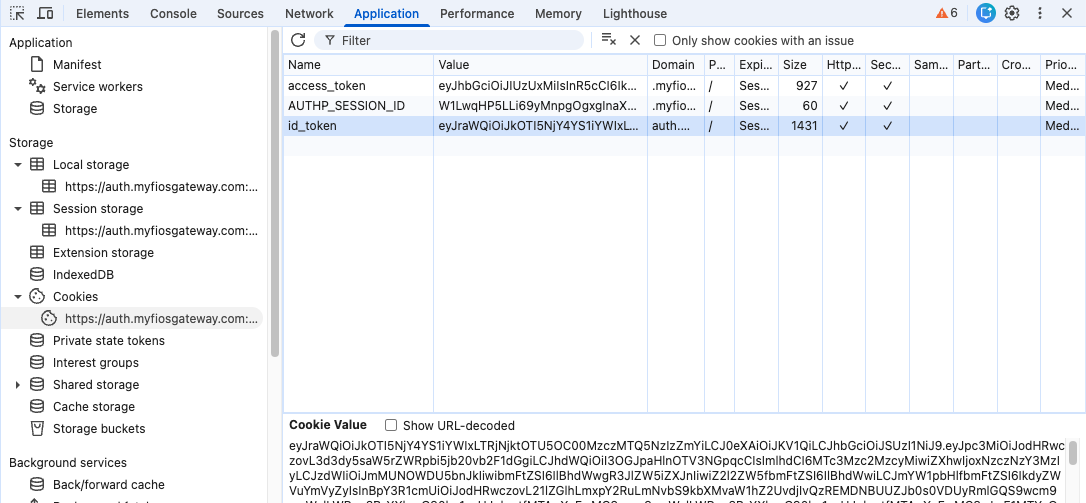
That cookie contains original id_token issued by LinkedIn.
{
  "iss": "https://www.linkedin.com/oauth",
  "aud": "78bihyg95w4jjp",
  "iat": 1773765084,
  "exp": 1773768684,
  "sub": "f1CNX59nrd",
  "name": "Paul Greenberg",
  "given_name": "Paul",
  "family_name": "Greenberg",
  "picture": "https://media.licdn.com/dms/image/v2/C4D03AQFIoK4T52FiFA/profile-displayphoto-shrink_100_100/profile-displayphoto-shrink_100_100/0/1516284211915?e=1775088000&v=beta&t=78UvpW7XSGP9PhQQLU-pV1jl4hFhZXqVpOPVZ6o-pio",
  "email": "greenpau@outlook.com",
  "email_verified": "true",
  "locale": "en_US"
}
By browsing to /auth/whoami?format=json&id_token=true, the original id_token issued by the
provider will be in the response.
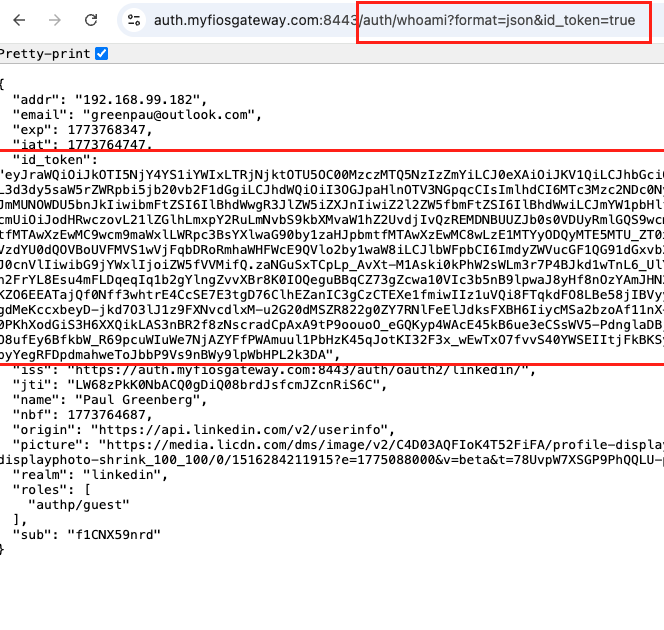
Profile UI uses /auth/whoami?format=json&id_token=true endpoint.